I have been releasing a lot of “Quick Tips” on Twitter recently. This post falls into that category. It isn’t necessarily a deep dive but something that has been requested a few times. In this post I will show you how to deploy SYSTEM Fonts using MEMCM (ConfigMgr)
1 . Background ⏏
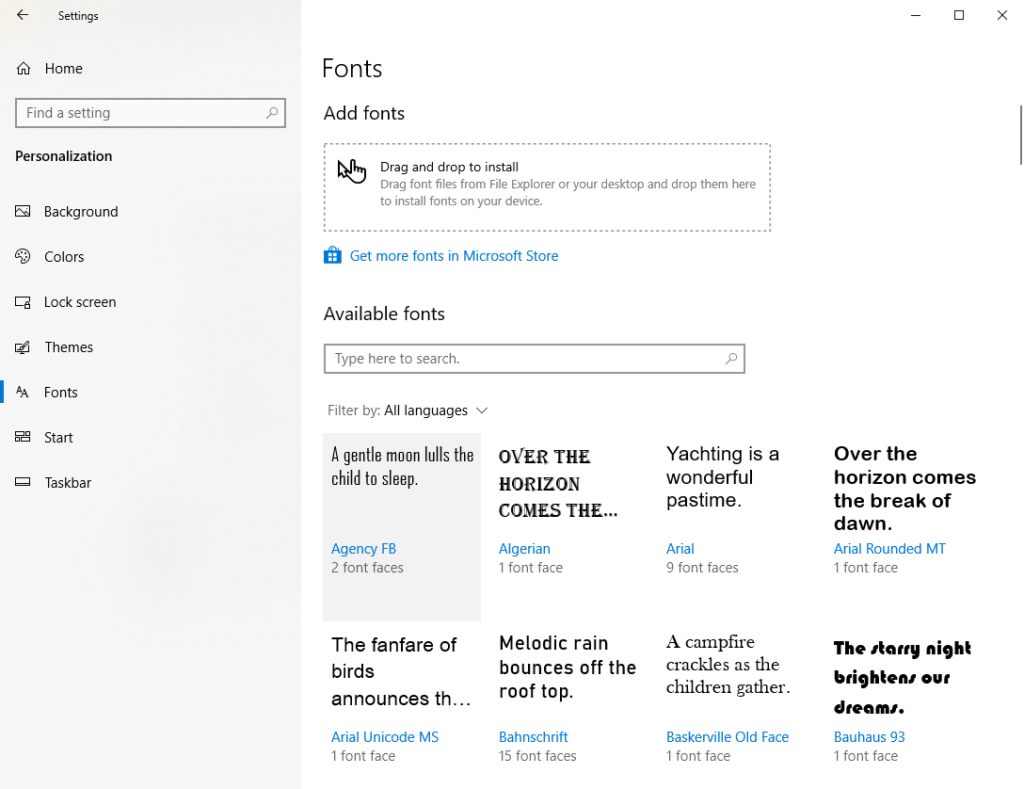
From time to time we may be asked to deploy Fonts to devices. This can be done manually via the Fonts Control Panel applet Start > Settings > Personalization > Fonts

or downloaded by the user from the Microsoft Store. But we like automation and we like MEMCM, so lets create a script and deploy the Font using an application.
2 . Prerequisites ⏏
The Font will need to be of file type:-
- TTF
- OTF
- FON
- FNT
If you have downloaded a Font from one of the many free sites, make sure you have permissions to distribute it in your organization. Not all Fonts are free for commercial use.
In this example, we are only installing a single Font – Switzerland.ttf
3 . Scripts ⏏
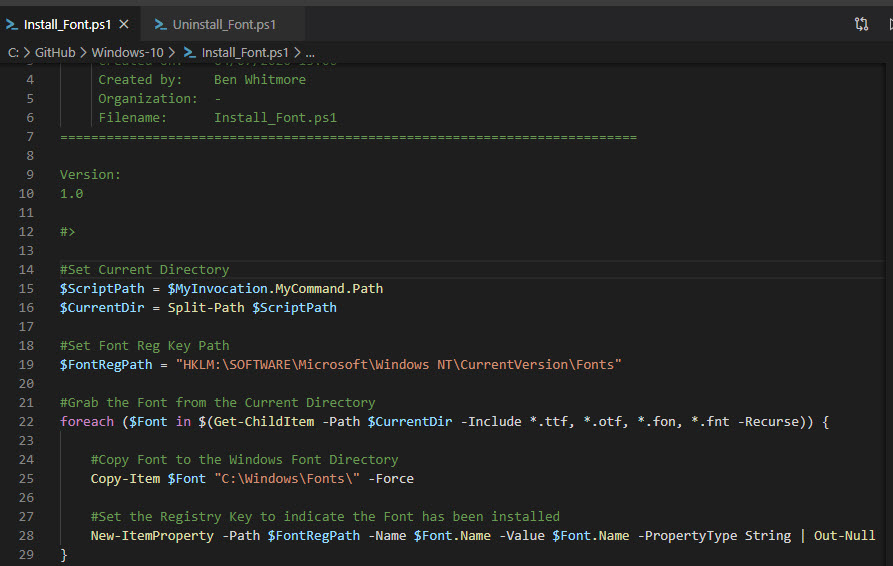
We will be using PowerShell to install the Font and will require two scripts. One for installation and another for uninstallation.
Script 1: Install a Font https://github.com/byteben/Windows-10/blob/master/Install_Font.ps1
|
1 2 3 4 5 6 7 8 9 10 11 12 13 14 15 16 17 18 19 20 21 22 23 24 25 26 27 28 |
<# =========================================================================== Created on: 04/07/2020 13:06 Created by: Ben Whitmore Organization: - Filename: Install_Font.ps1 =========================================================================== Version: 1.0 #> #Set Current Directory $ScriptPath = $MyInvocation.MyCommand.Path $CurrentDir = Split-Path $ScriptPath #Set Font Reg Key Path $FontRegPath = "HKLM:\SOFTWARE\Microsoft\Windows NT\CurrentVersion\Fonts" #Grab the Font from the Current Directory foreach ($Font in $(Get-ChildItem -Path $CurrentDir -Include *.ttf, *.otf, *.fon, *.fnt -Recurse)) { #Copy Font to the Windows Font Directory Copy-Item $Font "C:\Windows\Fonts" -Force #Set the Registry Key to indicate the Font has been installed New-ItemProperty -Path $FontRegPath -Name $Font.Name -Value $Font.Name -PropertyType String | Out-Null } |
Script 2: Uninstall a Font https://github.com/byteben/Windows-10/blob/master/Uninstall_Font.ps1
|
1 2 3 4 5 6 7 8 9 10 11 12 13 14 15 16 17 18 19 20 21 22 23 24 25 26 27 28 |
<# =========================================================================== Created on: 04/07/2020 13:06 Created by: Ben Whitmore Organization: - Filename: Uninstall_Font.ps1 =========================================================================== Version: 1.0 #> #Set Current Directory $ScriptPath = $MyInvocation.MyCommand.Path $CurrentDir = Split-Path $ScriptPath #Set Font Reg Key Path $FontRegPath = "HKLM:\SOFTWARE\Microsoft\Windows NT\CurrentVersion\Fonts" #Grab the Font from the Current Directory foreach ($File in $(Get-ChildItem -Path $CurrentDir -Include *.ttf, *.otf, *.fon, *.fnt -Recurse)) { #Remove the Font from the Windows Font Directory Remove-Item (Join-Path "C:\Windows\Fonts" $File.Name) -Force | Out-Null #Remove the corresponding Registry Key Remove-ItemProperty -Path $FontRegPath -Name $File.Name | Out-Null } |
4 . MEMCM Application ⏏
1 . Put the following files into your source content directory.
Install_Font.ps1
Uninstall_Font.ps1
Switzerland.ttf

2 . Navigate to Software Library > Application Management > Applications > Create Application

3 . Select Manually specify the application information and click Next

4 . Fill in the Application information and click Next

5 . Specify how the Application will appear in the Software Centre and click Next

6 . Click Add to add a Deployment Type

7 . Select Script Installer from the drop down box and click Next

8 . Specify a Name and click Next

9 . Specify the following information and click Next
- Content Location = We identified the source files in Step 1
- Installation Program = Powershell.exe -ExecutionPolicy Bypass -File “Install_Font.ps1”
- Uninstallation Program = Powershell.exe -ExecutionPolicy Bypass -File “Uninstall_Font.ps1”

10 . Click Add Clause to specify a detection method

11 . Add the Path and File Name of the font and click OK

12 . Click Next
13 . Set the following information and click Next
- Installation Behaviour = Install for System
- Logon Requirement = Whether or not a user is logged on
- Installation Program Visibility = Hidden
- Maximum Allowed Run Time = 15
- Estimated Installation Run Time = 2

14 . Click Add to add a Requirement

15 . Set the Condition to Operating System and select All Windows 10 (64bit) and click OK

16 . Click Next three times and then click Close
17 . Click Next twice
18 . Review the Application Summary and click Close
19 . Right clikc the application and choose Deploy

20 . Choose a Collection to deploy the new application to and click Next

21 . Click Add and choose a Distribution Point or Distribution Point Group and click Next

22 . Choose a Purpose for the deployment, in this example we have chosen to make the application Available in the Software Centre. Click Next

22 . Click Next on the Specify the schedule for this deployment step or set a time/day when this application will be available from
23 . Set the User notifications to something suitable for your environment and click Next

23 . Click Next on the Alerts step or specify a setting suitable for your environment

24 . Click Next, review the deployment and click Close
5 . Observe the Deployment ⏏
If we allow adequate time or force a machine policy refresh on a Windows 10 client targeted for deployment we will see our new app in the Software Centre

Click Install

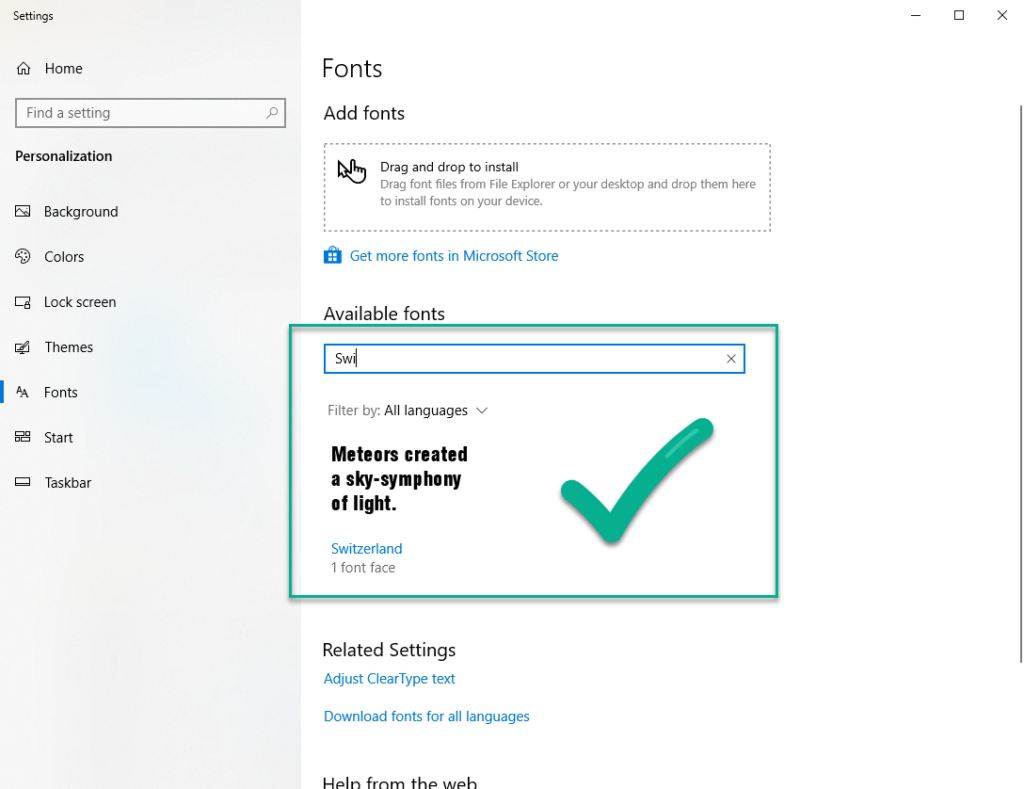
Launch the Fonts control panel applet to verify the Font has been installed

Summary
In this post we used two fairly simple PowerShell scripts to deploy a single Font to Windows 10 devices. The same scripts can be used to deploy the Font from Intune as a Win32App. See my previous post for an example of how to deploy a Win32App from Intune
https://byteben.com/bb/deploy-custom-microsoft-teams-backgrounds-easily-with-powershell-and-intune/


Thank you for this! it was extremely helpful since all the other solutions I researched are out of date. One quick note if you copy and paste the install and uninstall commands retype the double quotes, they don’t copy over properly from the clipboard and you will get an 0xfffd0000(-196608) error when installing via software center
Can you elaborate on what you had to do to get this to work? I have retyped the double quotes and am getting the same error code.
Hey, did you copy the Code from the Git Repo or the script block on this page? Ben
I tried both, same result. Originally just copied the code.
Same error here with this script, copied or typed. I tried 6 different Powershell scripts found around web to install 2 fonts via MEMCM, none of the solutions worked. I tested with Win10 versions 1903,1909 an 2004. Finally, I created MSI installer using Master Packager and that solution worked. It’s strange how something so simple as copying files to predefined folder and adding registry key can be near impossible to do for multiple computers.
Can you deploy other scripts in your environment without issues to your clients? Does appenforce.log indicate a specific failure?
I faced the same issue during the installation with error 0xfffd0000(-196608). I am still testing it, but I have manually added the set-executionpolicy bypass cmdlet on the script and ran it locally and it worked but not through MEMCM software deployment…
can you paste the “installation program” in a reply for the deployment type you created?
I got it to work now. When creating the app deployment package under the content section I copied the command (Powershell.exe -ExecutionPolicy Bypass -File “script.ps1”) from your post and somehow when I pasted it on MEMCM it copied some unidentified text format which caused this error. What I did is just removed the double quotes and retyped it, and it worked! I had issues with the detection method since I am using multiple fonts, but I fixed it.
Thank you Ben for the amazing post, I was searching everywhere to find a solution and all the other solutions did not work.
Excellent outcome, well done Ezi 🙂
I may start posting command lines in code block too.
Thanks Ezi, that fixed my issue.
This is what fixed my issue, thanks a lot for your post.
When you copy and paste the install command from my WordPress page check you have ASCII 34 and not 148 for your double quotes – that normally throws the error you got 🙂
When you copy and paste the install command from my WordPress page check you have ASCII 34 and not 148 for your double quotes – that normally throws the error you got 🙂
If you are installing multiple fonts, do you have to do this for each font? Or is there a way of adding multiple fonts in one go?
The scripts will install/uninstall all the fonts in the source directory. If you are placing multiple fonts in the source dir then ensure you specify each one on your application detection method.
Unfortunately, this has not been my experience. My deployment only installed one of the fonts. Perhaps I am doing something wrong. I will re-read the guide.
The guide is great. I just bookmarked byteben and will be sharing your site with my colleagues. I can’t express how much I appreciate people who are so willing to help online.
I believe I was mistaken. My deployment was failing because of the quotes issues pointed out by Ezi. I must have thought it was installing only a single font because of some less effective guides I came across before finding this one.
The script in this guide definitely installs and uninstalls multiple fonts! Thank you, Ben!
Thanks Ben for this.
I had to make a small change to your SCCM installation code to get it to work. Otherwise my SCCM couldn’t find the fonts and gave some odd errors.
Here is the code I used:
powershell.exe -ExecutionPolicy Bypass -File .\Install_Fonts.ps1
powershell.exe -ExecutionPolicy Bypass -File .\Uninstall_Fonts.ps1
Thanks for this great script! Installing works reliably in every case I’ve tested so far, but uninstalling, not so much. With installing, I’m getting access denied errors like this:
Remove-Item : Cannot remove item C:\WINDOWS\Fonts\.ttf: Access to the path ‘C:\WINDOWS\Fonts\.ttf’ is denied.
Did you run across this in your testing at all? I find that if I wait a few minutes and try running it again, it’ll work and uninstall the fonts, but it’s hit and miss, and often takes several tries.
Hi Scott – it looks like the uninstall script could not find any Fonts in the source folder. Can you run this script and tell me the output?
$ScriptPath = $MyInvocation.MyCommand.Path
$CurrentDir = Split-Path $ScriptPath
foreach ($File in $(Get-ChildItem -Path $CurrentDir -Include *.ttf, *.otf, *.fon, *.fnt -Recurse)) {Write-Output $File.Name}
Sorry, I realized after I submitted that comment that the website stripped out the characters I had. I had the greaterthan/lessthan tags around the text “FontName”. So the path IS going to the correct font names and trying to remove the right ones, but uninstall doesn’t always work. It seems to work fine if I restart the computer and then immediately run the uninstall script. But otherwise, there seems to be processes locking the fonts, making uninstallation unreliable if, say, Microsoft Word was opened by the user some time before uninstall, and the user had either clicked the fonts dropdown (thereby loading the font trying to be removed), or actually used the font in the document. If Word is then closed, the font is still active in the system, and attempting to remove it, even as an elevated command prompt under the system context, throws Access Denied because the font is locked by a process. Again, restarting the computer and then running the uninstall script before anything can load the font seems to work, but unreliable. Wondering if you’ve come across this or have any other way to say, check for a the process that’s using the font, and killing it.
I haven’t experienced the issue before where an app holds the font open – you could look at creating the script to run at logon instead of using the app method.
Do I need to edit anything on the script?
Hi John, no. You would have to change the detection method to look for the font/s that you deploy though as per step 11
Hello, Thank you very much for this info. It worked great. We deployed a font using this method to over 800 computers and now wish to uninstall them. I can’t seem to figure out how to modify the deployment for it to uninstall the font now. Can you guide me on what I need to do to uninstall the font? Thanks for all of your help.
Nice !
thanks for this share
Hello,
Thank you for the very concise and informative guide. Is there a way to modify the script to install multiple fonts? All of our fonts include bold, italic, etc.
I believe I was mistaken. My deployment was failing because of the quotes issues pointed out by Ezi. I must have thought it was installing only a single font because of some less effective guides I came across before finding this one.
The script in this guide definitely installs and uninstalls multiple fonts! Thank you, Ben!
Worked perfectly Windows 10 version 21H2. Thank you!